Azure Deployment
Provides instructions for connecting the CCA service to a customer Azure subscription by creating a service principal with read-only access.
CLI Support Coming Soon
This guide currently covers the Azure Portal (console) workflow only. A corresponding Azure CLI section will be added in a future release.
Prerequisites
- Access to the Azure Portal with sufficient permissions to create App Registrations and assign roles at the Management Group level.
Create a Service Principal
A service principal is an identity the CCA AI service uses to authenticate and read resources from your Azure subscription. The steps below walk through creating an App Registration in Microsoft Entra ID and granting it the built-in Reader role at the Tenant Root Group level so that CCA has read-only visibility across your tenant.
Step 1 — Open Microsoft Entra ID
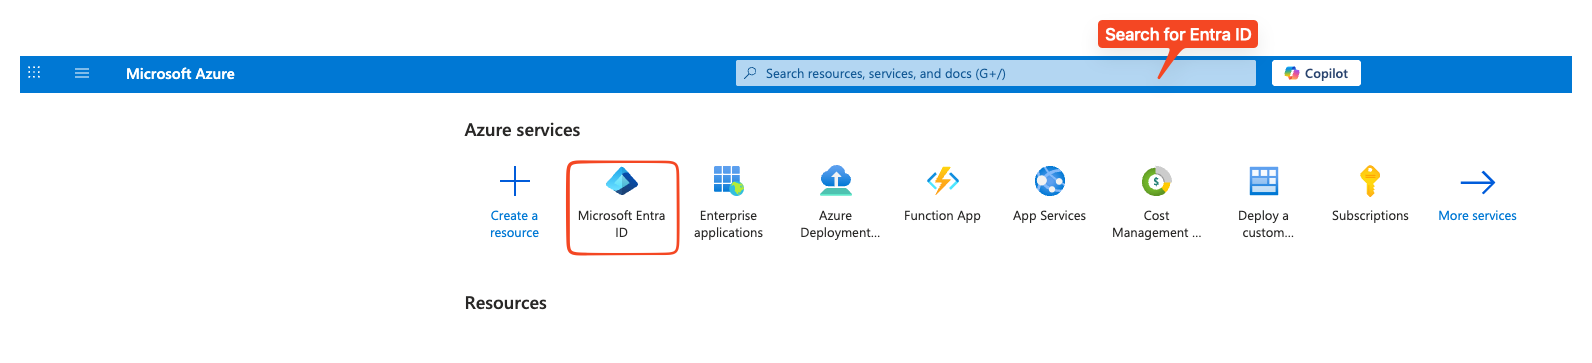
From the Azure Portal home page, locate the Microsoft Entra ID tile in the list of Azure services, or type Microsoft Entra ID in the top search bar and select it from the results.
Step 2 — Navigate to App Registrations
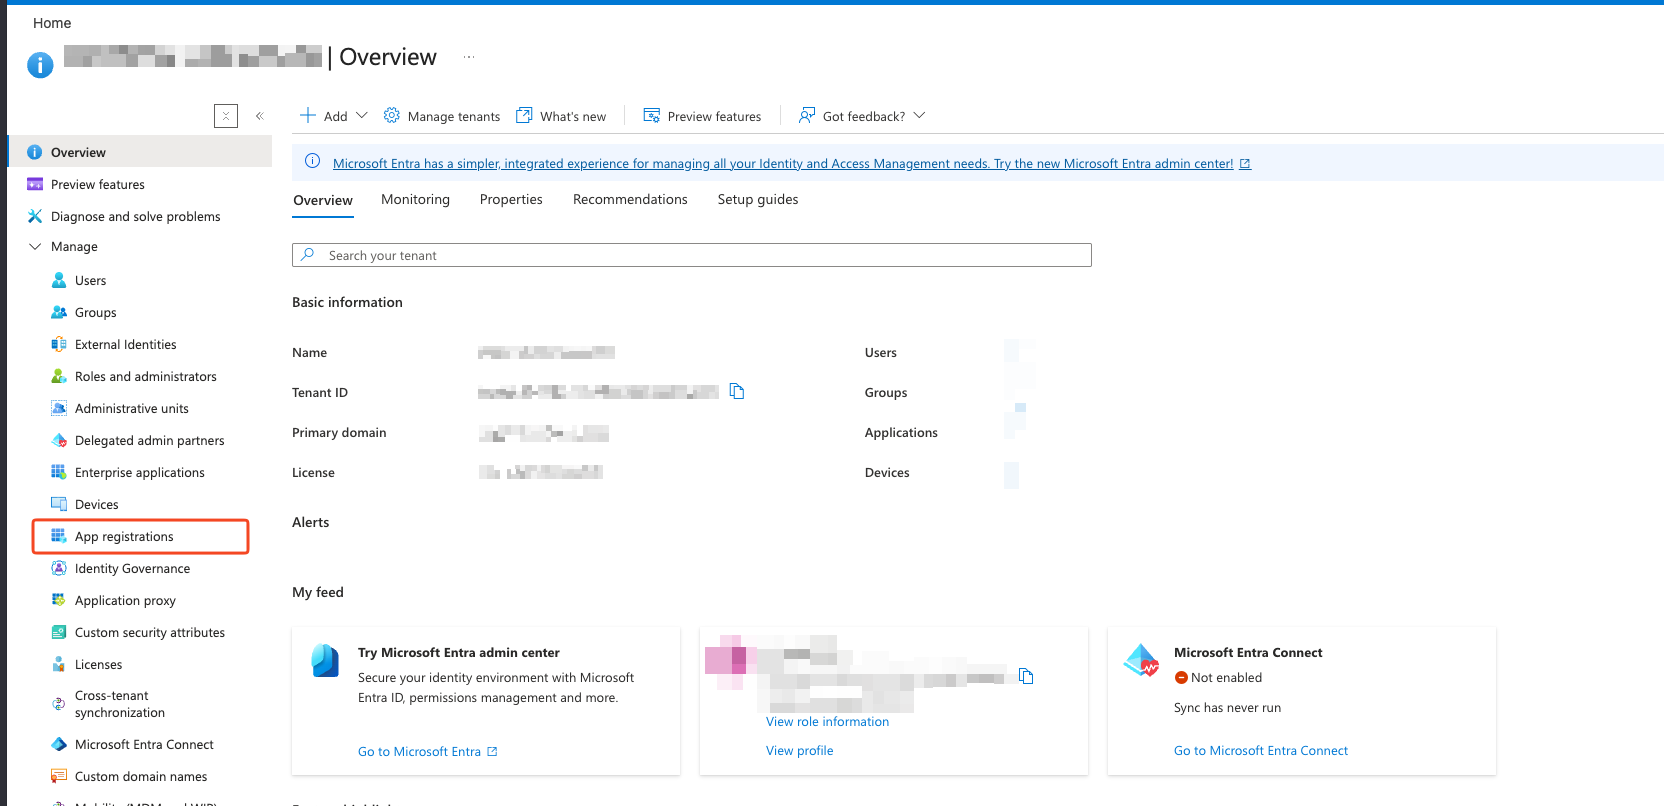
On the Microsoft Entra ID overview page, select App registrations from the left-hand navigation menu.
Step 3 — Create a New Registration
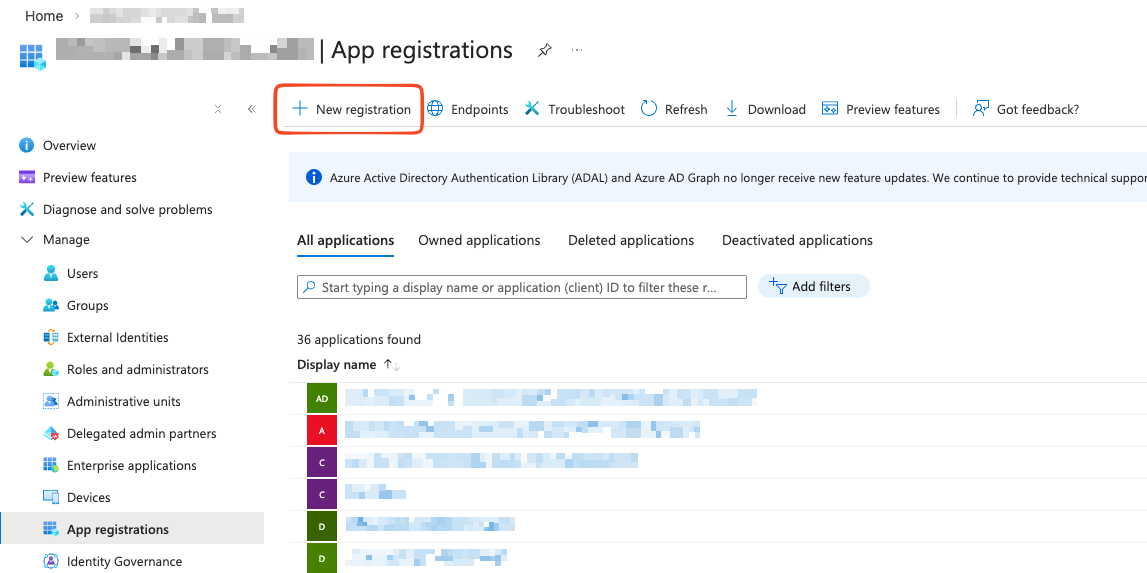
Click + New registration at the top of the App registrations page.
Step 4 — Register the Application
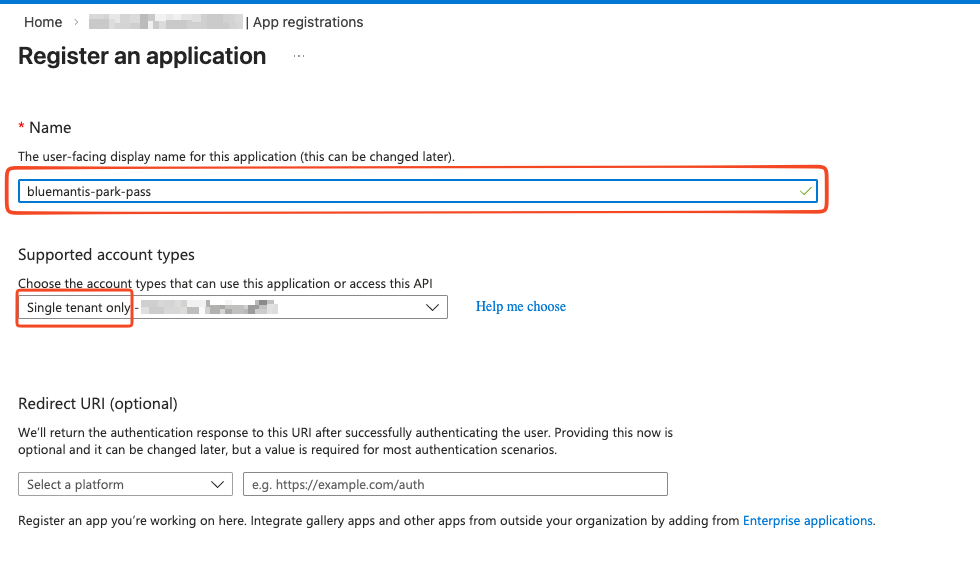
On the Register an application page:
- Name — Enter
bluemantis-park-pass. - Supported account types — Select Accounts in this organizational directory only (Single tenant).
- Leave Redirect URI blank.
- Click Register.
Step 5 — Copy the Application IDs and Add a Secret
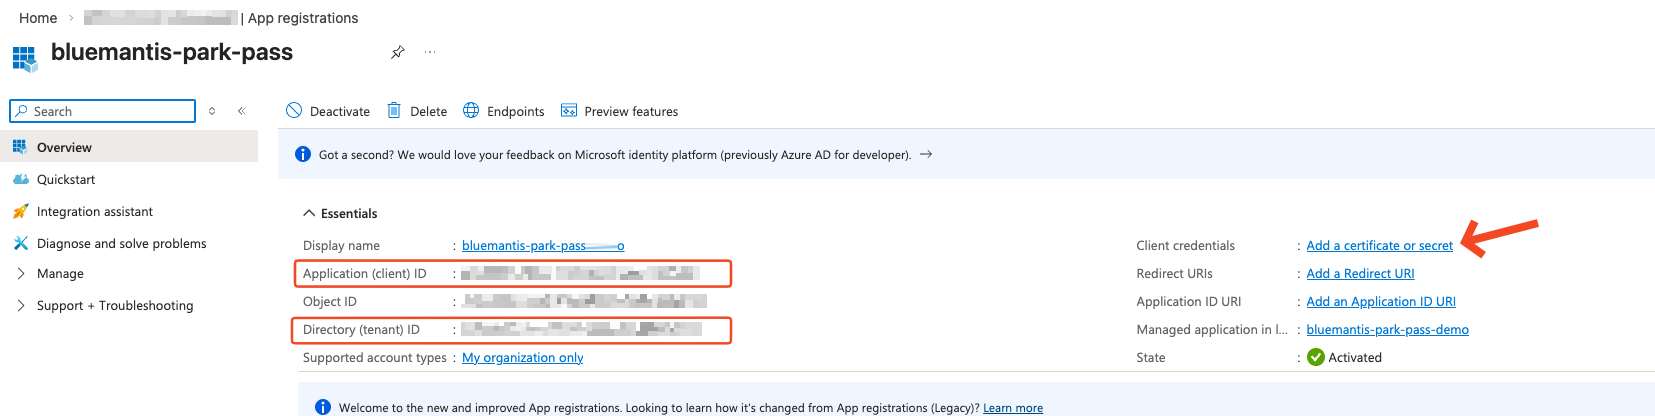
After registration, the application overview page is displayed. Record the following values — you will need them when configuring CCA:
| Field | Description |
|---|---|
| Application (client) ID | Unique identifier for the registered application |
| Directory (tenant) ID | Your Azure Active Directory tenant identifier |
Then click Add a certificate or secret on the right-hand side to create credentials for the service principal.
Step 6 — Create a New Client Secret
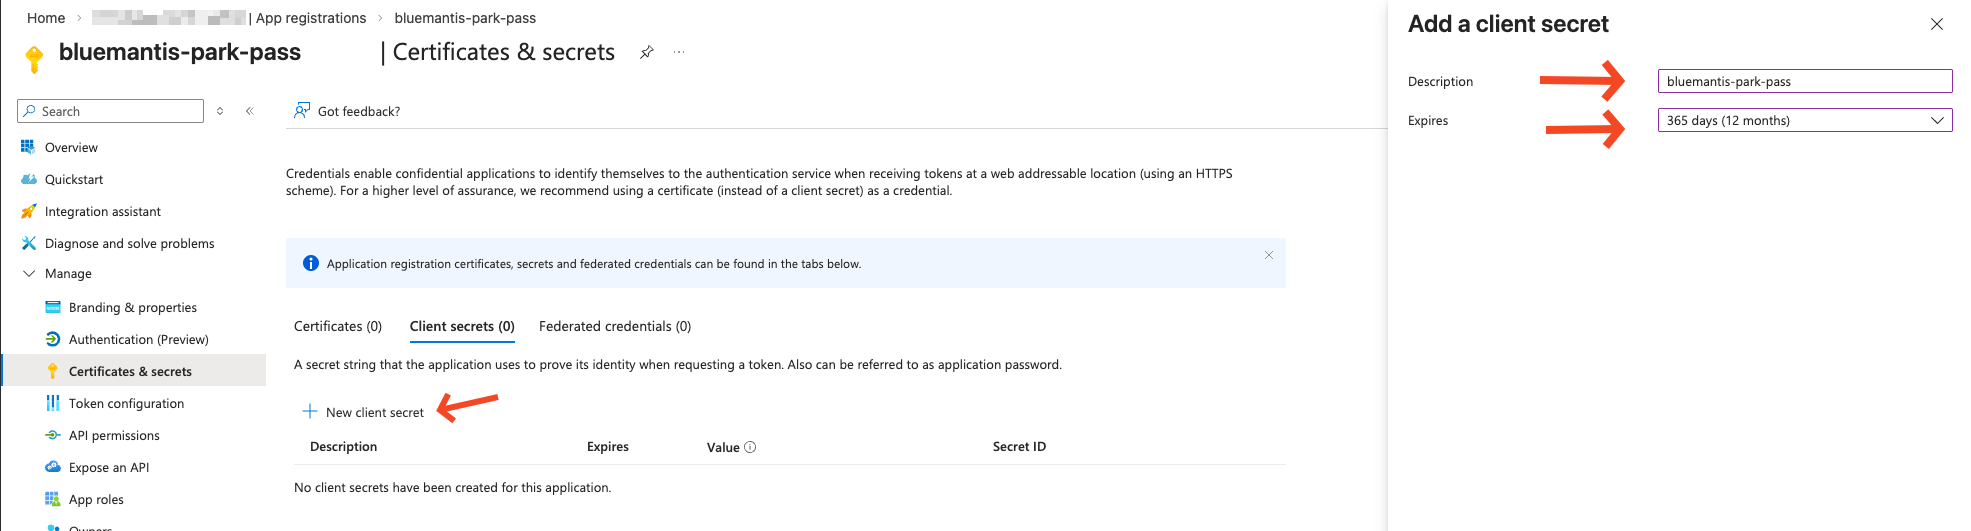
On the Certificates & secrets page, click + New client secret and configure the secret:
- Description — Enter a meaningful label (e.g.,
cca-park-pass-secret). - Expires — Select 12 months (or the expiry period required by your security policy).
- Click Add.
Secret Rotation
You are responsible for rotating this secret before it expires. CCA will fail to authenticate if the secret has expired.
Step 7 — Copy the Secret Value
Immediately after the secret is created, copy the Value column — this is the only time Azure displays the full secret. Store it securely (e.g., in a secrets manager).
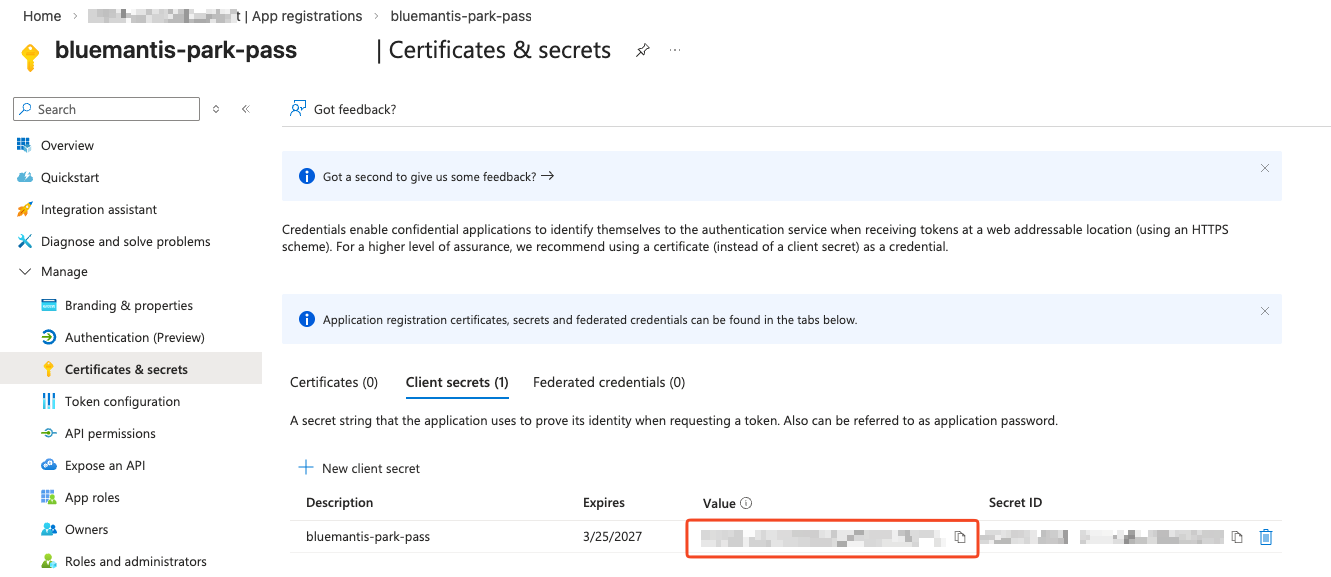
Copy the value now
Once you navigate away from this page the secret value is masked and cannot be retrieved. You will have to create a new secret if the value is lost.
Grant Read-Only Access
The service principal must be granted the Reader role at the Tenant Root Group level so it can read resources across the subscription. This is a read-only role and grants no ability to create, modify, or delete resources.
Step 8 — Open Management Groups Access Control
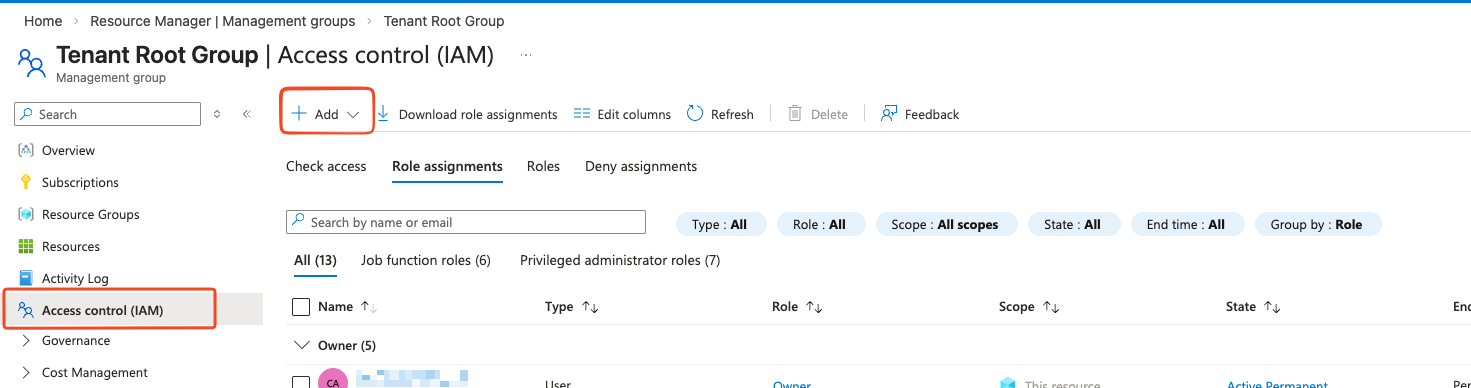
Navigate to Azure Resource Manager → Management Groups, then select the Tenant Root Group. On the group's detail page, select Access control (IAM) from the left-hand menu, then click + Add → Add role assignment.
Step 9 — Add a Role Assignment
In the Add role assignment panel, select Add role assignment from the dropdown.

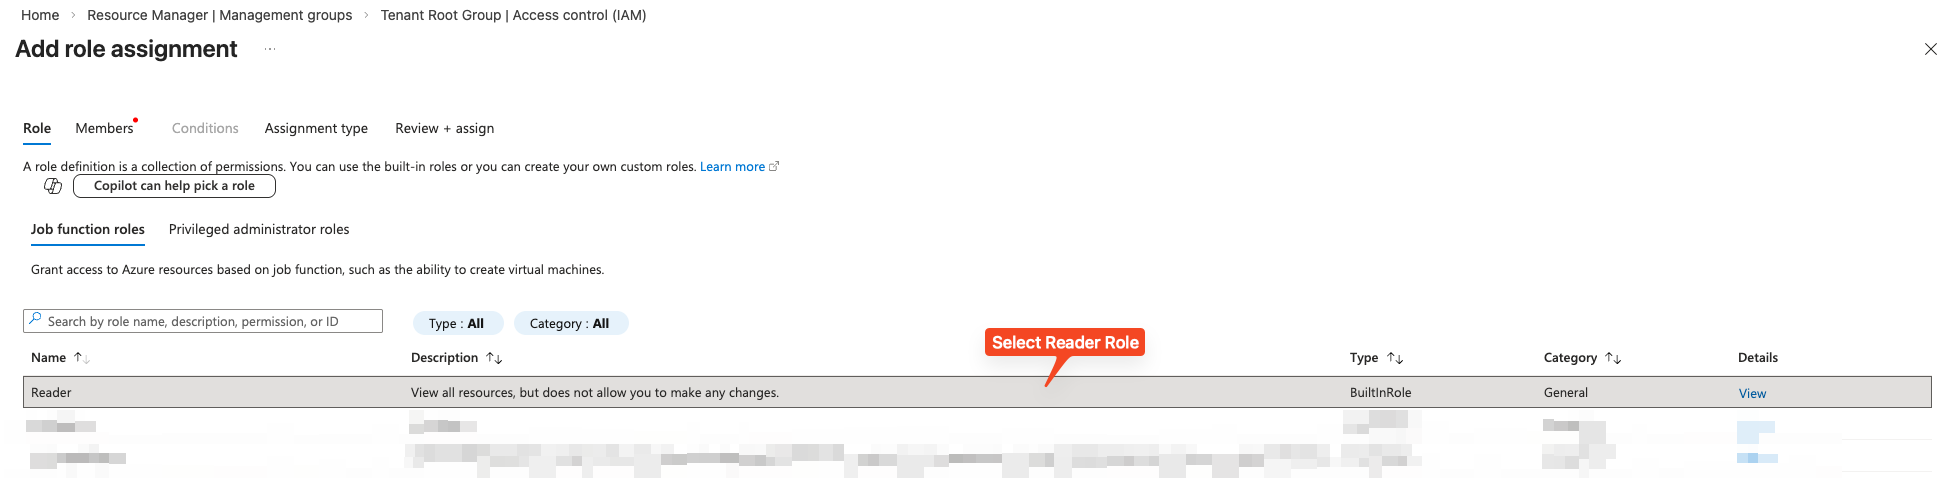
Step 10 — Select the Reader Role
On the Role tab, search for and select Reader, then click Next.
Step 11 — Assign the Role to the Service Principal
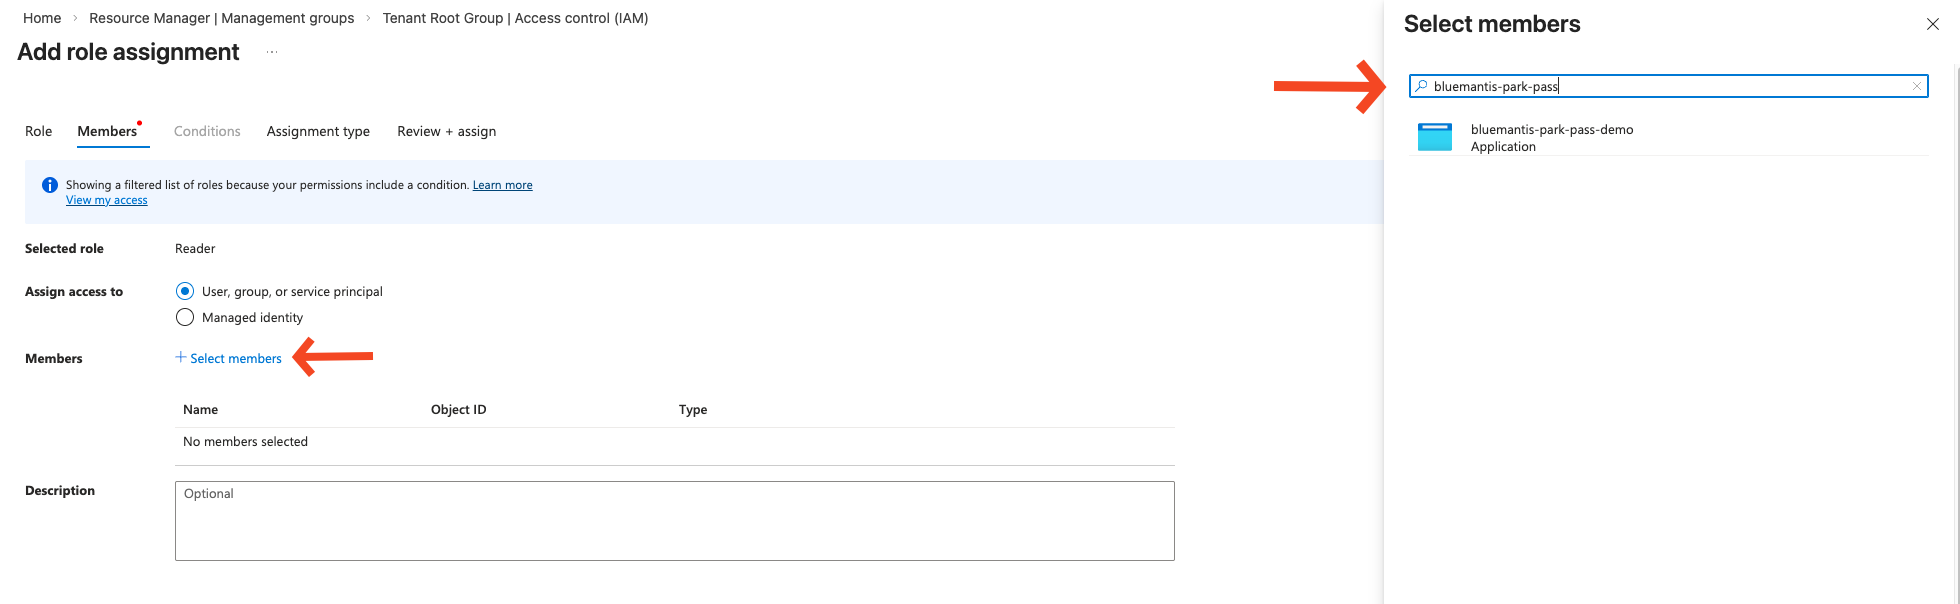
On the Members tab:
- Assign access to — Select User, group, or service principal.
- Click + Select members and type
bluemantis-park-passin the search box. - Select the
bluemantis-park-passapplication from the results. - Click Select, then click Next.
Step 12 — Review and Assign
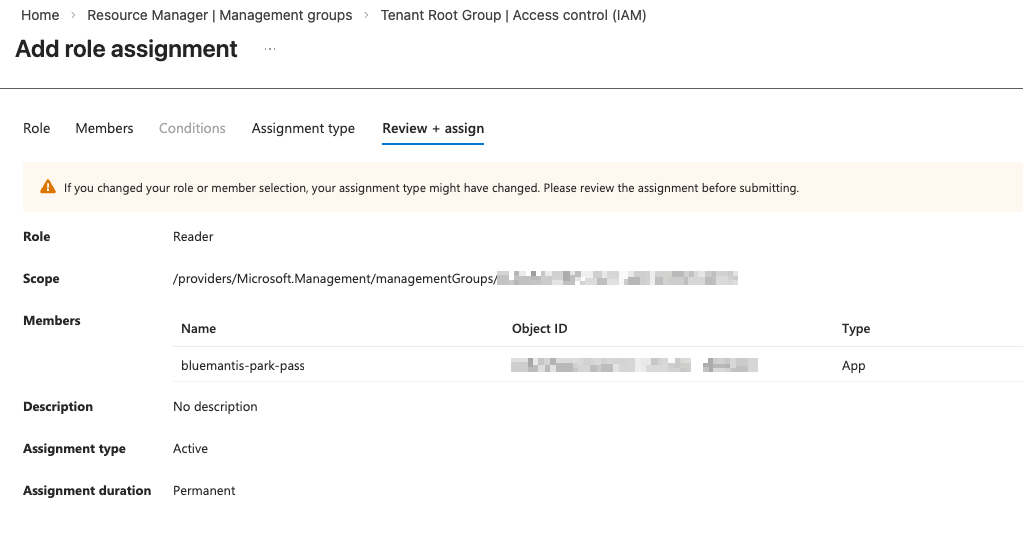
On the Review + assign tab, verify that:
- Role is
Reader - Members shows
bluemantis-park-pass
Click Review + assign to apply the role assignment.
Register with Blue Mantis CCA
Step 13 — Submit Your Credentials via the Blue Mantis Portal
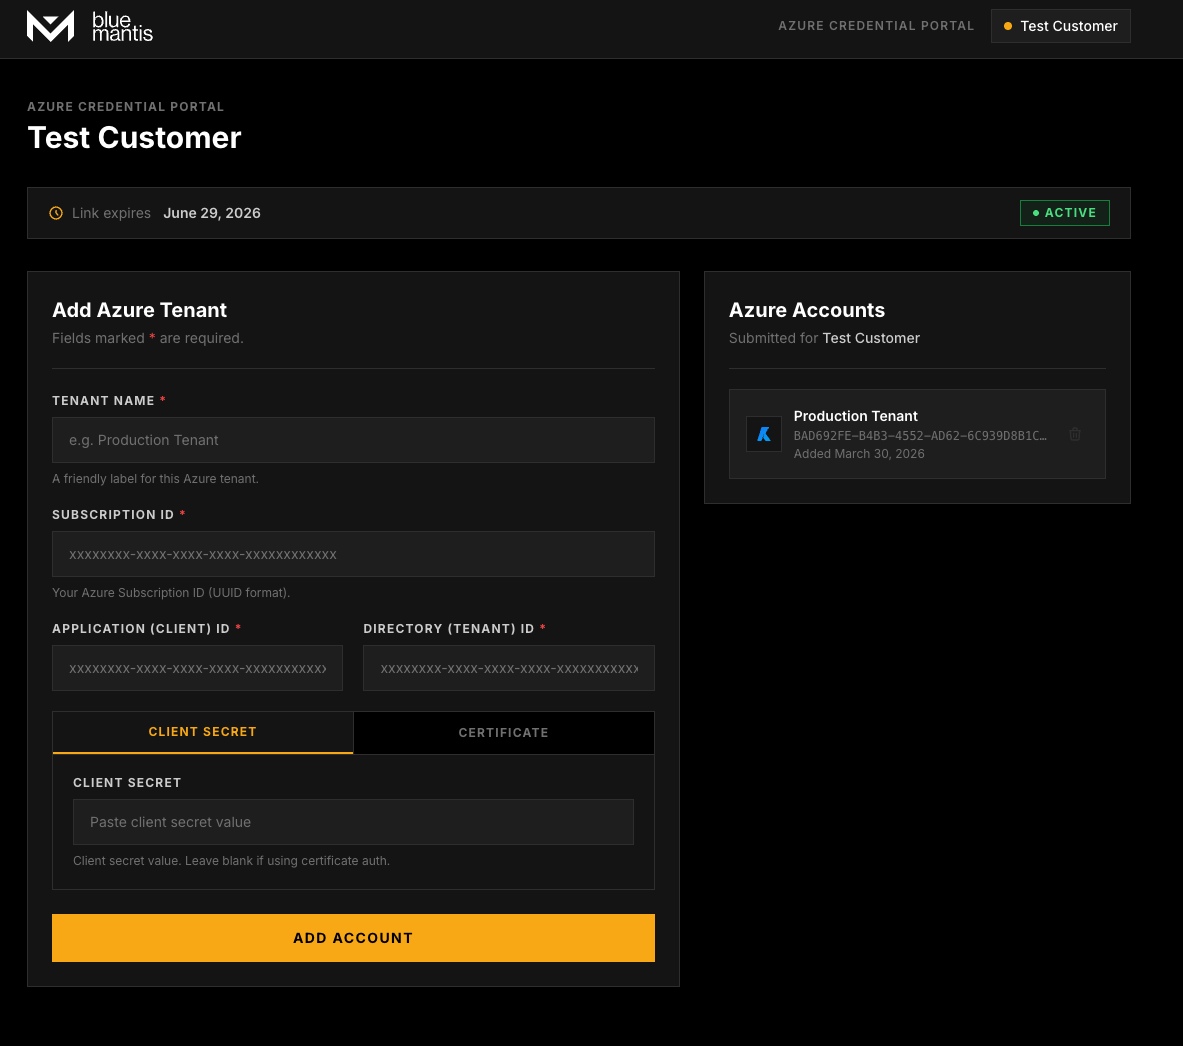
Once the service principal has been created and the Reader role assigned, the final step is to register your tenant with the Blue Mantis CCA system. Blue Mantis will provide you with a unique portal link. Open that link in your browser and fill in the following values collected during the steps above:
| Field | Source |
|---|---|
| Application (client) ID | App registration overview page (Step 5) |
| Directory (tenant) ID | App registration overview page (Step 5) |
| Client secret value | Certificates & secrets page immediately after creation (Step 7) |
Submitting the form registers your Azure tenant and service principal with the CCA system, granting Blue Mantis the read-only access required to begin onboarding.
Certificates Supported
If your security policy prefers certificate-based authentication over client secrets, CCA also supports uploading a certificate for the service principal. When prompted in the portal, select the Certificate option instead of Secret and provide the certificate value accordingly. If you are unsure which to use, a client secret is the simpler option for most environments.
Registration Complete
Once submitted, your Azure environment will be queued for onboarding. A Blue Mantis engineer will reach out to confirm access and next steps.
Summary of Collected Values
| Value | Where to Find It |
|---|---|
| Application (client) ID | App registration overview page (Step 5) |
| Directory (tenant) ID | App registration overview page (Step 5) |
| Client secret value (or certificate) | Certificates & secrets page immediately after creation (Step 7) |
| Portal link | Provided directly by your Blue Mantis account team |